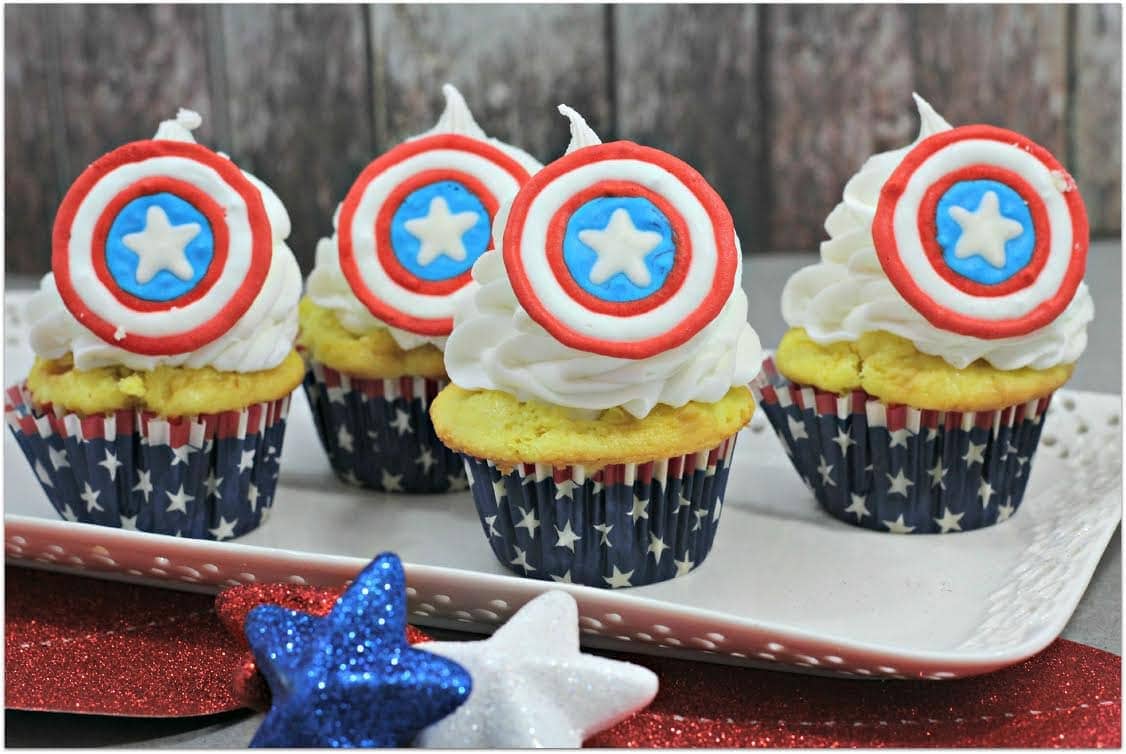
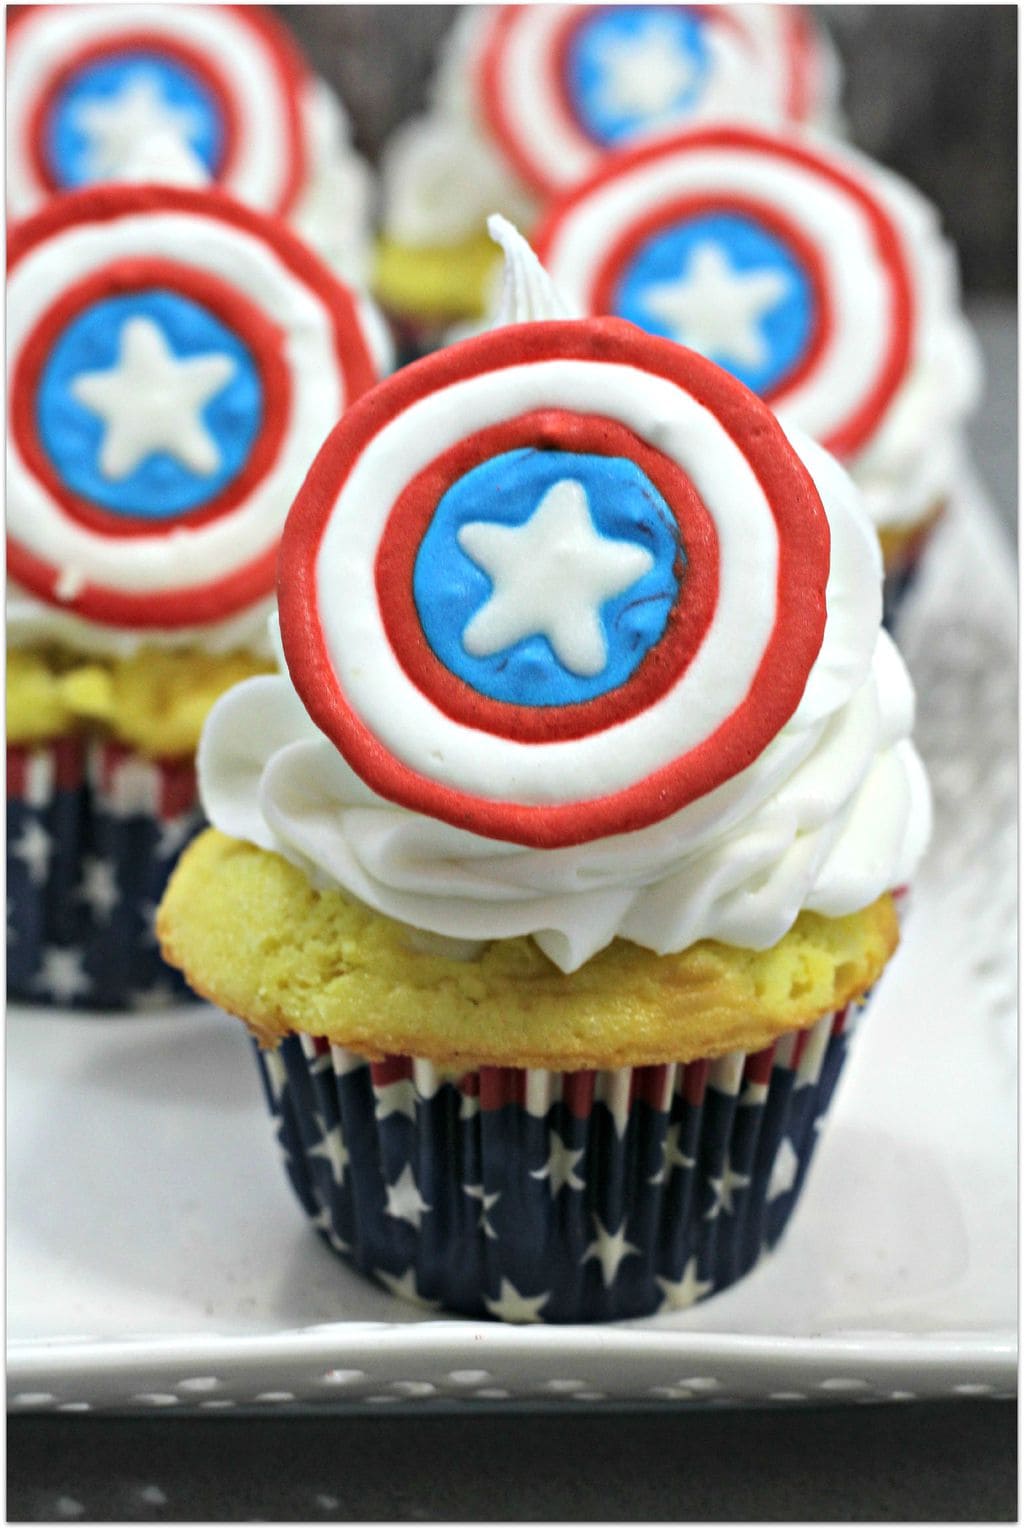
Easy Captain America Cupcakes
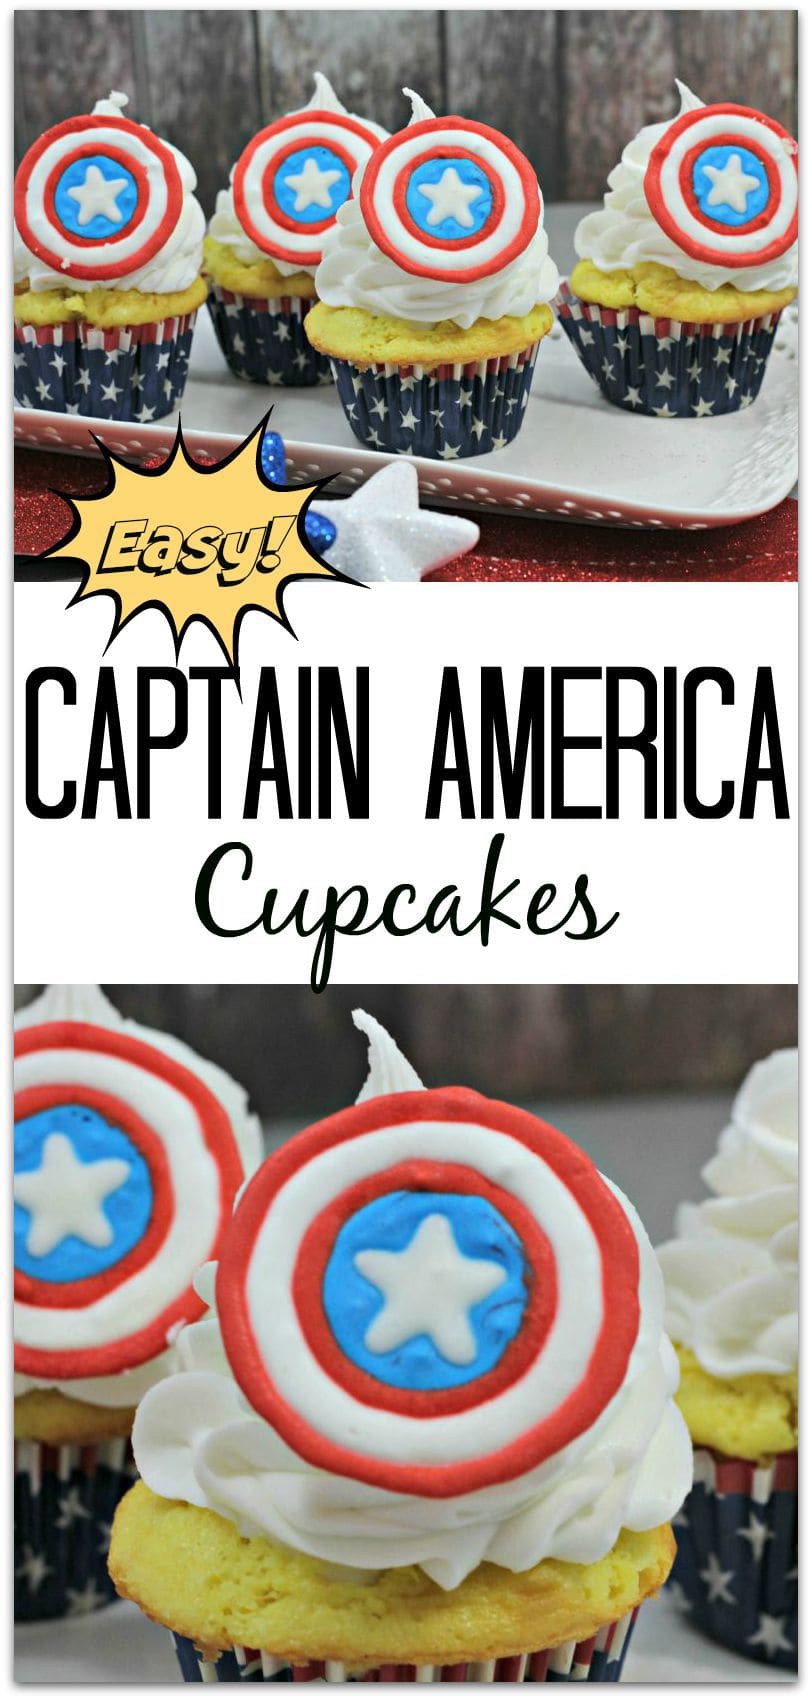
Who else loves The Avengers? You know I do! I thought to create these Captain America Cupcakes, perfect for an Avengers party or any party where a Superhero is the star. There are a lot of steps to this recipe, but it is not hard to do! Keep in mind that you want to make the “shield” in plenty of time so it can dry 5-10 hours. I’d love to see your creations!
Captain America Cupcakes
Vanilla Cupcake Ingredients
3 C flour
3 1/2 tsp baking powder
1 C whole milk
2 C sugar
1 C stick margarine
4 eggs
4 tsp vanilla
Vanilla Frosting Ingredients:
1 C unsalted butter, room temp
4+ C powder sugar
4 TBSP heavy whipping cream
Royal Icing Ingredients:
2 egg whites
1 C powdered sugar
1/2 tsp cream of tartar
Red & blue gel food coloring
Vanilla Cupcake Directions:
Preheat oven to 350 degrees.
-Line cupcake tins with paper liners.
-Cream the margarine with the sugar in a mixing bowl.
-Sift flour and baking powder in a second bowl.
-Add eggs one at a time, mixing after each addition to the margarine and sugar mixture.
-Add vanilla to the same mixture.
-Alternate adding the dry mixture and the whole milk to the wet mixture.
-Begin and end the addition with the flour mixture.
-Mix well to make sure all ingredients are well mixed.
-Using a large ice cream scoop add the batter to the paper lined cupcake tins.
-Fill only 3/4 full.
-Bake at 350 degrees for 20-25 minutes or until an inserted toothpick comes out clean.
-Allow to cool completely.
Vanilla Frosting Directions:
-Cream the butter and powdered sugar until it looks light and creamy.
-If it doesn’t cream add several drops of the heavy whipping cream until it creams.
-Test to see if the frosting can form and hold a stiff peak by taking a spoonful of frosting and turning the spoon upside down. If the frosting stays on the spoon it is ready. If not then….
– Add more powdered sugar 1/2 C at a time…. mix well.
-If ready scoop the frosting into a pastry bag with a large tip.
-Twist the open end of the pastry bag to push the frosting to the tip.
-Start the frosting on the outside edge of the cupcake working to the center of the cupcake.
Royal Icing Directions:
-Combine all ingredients in a mixing bowl mixing on medium speed for 4 minutes. (except your food coloring)
-If icing is not stiff enough add 1/4 C powder sugar.
– Divide the icing equally into 3 bowls.
-Add several drops of red gel food coloring in the large bowl (#1)of icing. Stir well to mix the color.
-Add several drops of blue gel food coloring in the large bowl(#2) of icing. Stir well to mix the color.
-In bowl #3 the icing stays white.
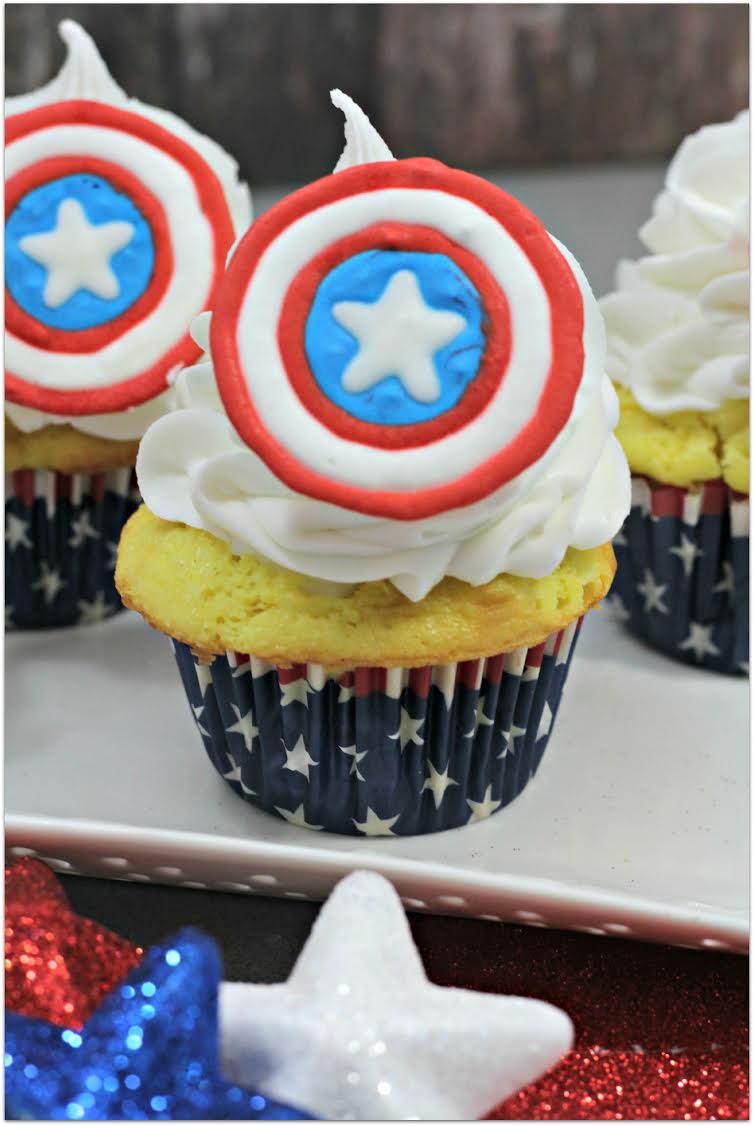
Captain America Shield:
-Locate a picture of Captain America’s Shield on Google. Print a picture of several of Captain America Shields in color. Tape this picture to a cookie sheet.
-Tape wax paper (covering the copies of the shield) to the cookie sheet . Follow the color and features as printed on the paper.
-Using a small pastry bag fill with the red royal icing and a #2 tip. Start by outlining the shield first. Fill in the 1st stripe with the red icing. Allow this to dry for 30 seconds.
-Using a small pastry bag fill with the white royal icing and a #2 tip. Outline the 2nd circle in the shield with white. Fill in the 2nd stripe with the white icing. Allow this to dry for 30 seconds.
-Using a small pastry bag fill with the red royal icing and a #2 tip. Outline the 3rd circle in the shield with red. Fill in the 3rd stripe with the red icing. Allow this to dry for 30 seconds.
-Using a small pastry bag fill with the blue royal icing and a #2 tip. Outline the 4th inner circle in the shield with blue. Do not fill in the area for the star as displayed in the picture. Fill in the rest of that area with the blue icing. Allow this to dry for 30 seconds.
-Using a small pastry bag fill with the white royal icing and a #2 tip. Outline the star in the center of the shield with white. Fill in the star with the white icing.
-Allow to dry for 5-10 hours.
-To ensure that the image is dry, gently touch one of them with your finger. If it allows you to push in on the icing, allow it to dry more. If the image is dry, it will have a hard feeling not allowing you to push in on it.
-Cut the wax paper holding the completed image into squares surrounding the completed design.
–Once the image is dry, carefully peel the wax paper off of the back of the images.
– Place on the frosted cupcake.